A simple guide to ratios, methods, and getting the balance right every time.
Introduction
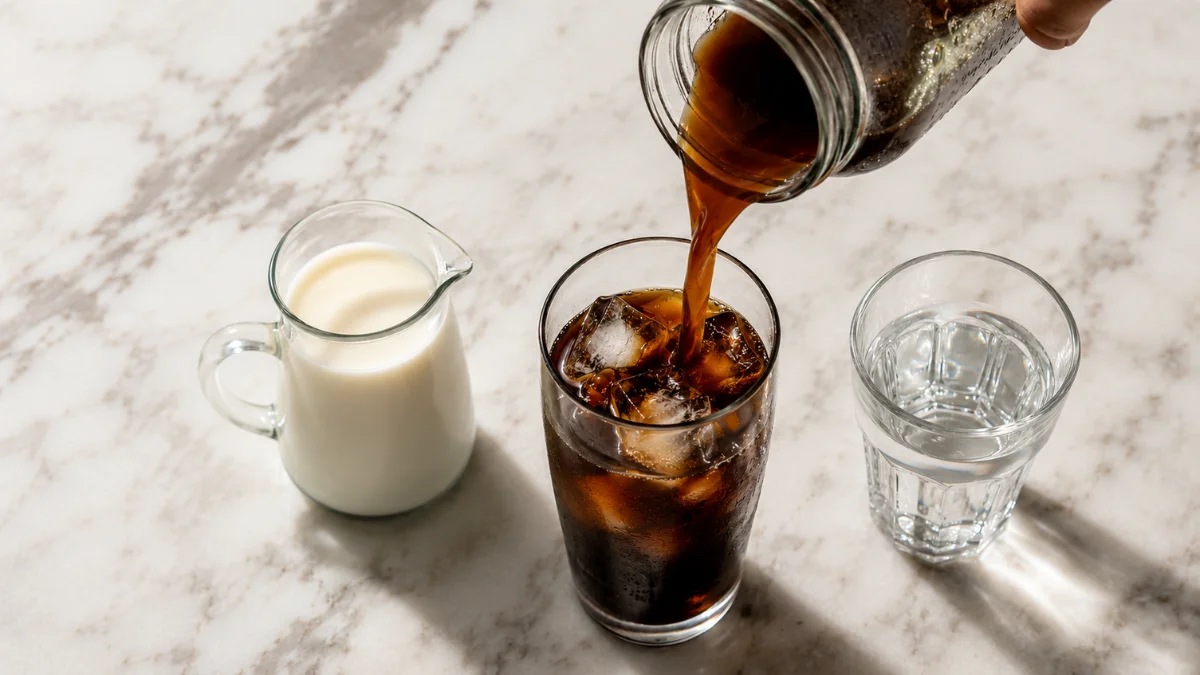
Cold brew is almost always made as a concentrate — brewed stronger than regular coffee, so it can be stored and diluted to taste before serving. Drink it straight, and it can taste overwhelmingly intense. Dilute it correctly, and you get a smooth, refreshing cup with none of the sharpness or bitterness that hot brew can produce.
Getting the dilution right is less complicated than it sounds. It comes down to understanding your starting concentration, choosing the right liquid to dilute with, and adjusting the ratio until the strength suits you.
This guide walks through everything — ratios, methods, common mistakes, and how different dilution choices affect the final cup.
If you are a beginner, read our comprehensive Home Coffee Brewing Guide: Methods, Grinders & Tools for more insights on the topic
Let’s start with the quick answer, then cover everything in detail below.
Quick Answer: Cold Brew Dilution Ratios
Start with a 1:1 ratio — one part cold brew concentrate to one part water or milk — and adjust from there.
| Strength Preference | Ratio (Concentrate : Liquid) | Result |
| Extra strong | 1:0.5 | Very intense — close to espresso strength |
| Strong | 1:0.75 | Bold and full-bodied |
| Balanced | 1:1 | Smooth, well-rounded — best starting point |
| Mild | 1:1.5 | Lighter body, gentler caffeine |
| Light | 1:2 | Subtle, easy-drinking, lower caffeine |
👉 Always taste before adding more liquid. It’s easier to dilute further than to strengthen a cup you’ve already watered down.
Before choosing a ratio, it helps to understand what cold brew concentrate actually is and why dilution matters.
What Is Cold Brew Concentrate?
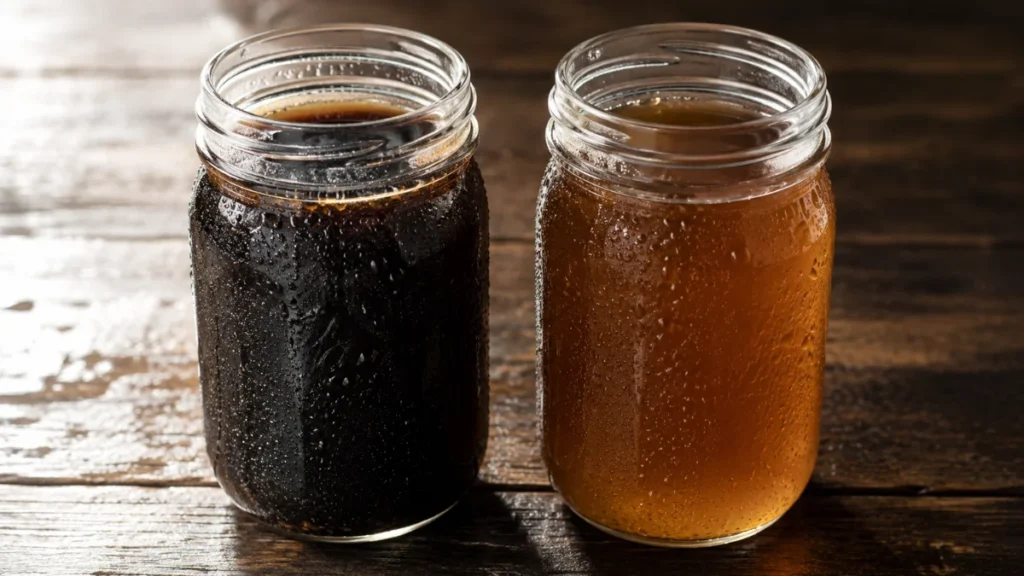
Cold brew concentrate is coffee brewed at a much higher coffee-to-water ratio than usual — typically 1:4 to 1:6 — and steeped in cold water for 12 to 24 hours. The slow, cold extraction process produces a liquid that’s smooth and low in acidity, but significantly more potent than a standard cup of coffee.
Unlike hot brew, cold brew doesn’t develop the same sharp or bitter compounds from heat. What you’re working with is a naturally sweet, mellow base — but one that’s two to three times stronger than ready-to-drink coffee. Diluting it properly brings out its best qualities without losing what makes it distinctive.
👉 If you bought store-bought cold brew and it’s already labeled ‘ready to drink,’ it’s pre-diluted. No additional dilution needed.
Why Diluting Cold Brew Matters
Skipping dilution doesn’t just make the coffee stronger — it changes the entire drinking experience in ways that most people find unpleasant.
- Undiluted concentrate can taste overwhelmingly intense and mask the coffee’s subtler flavors
- The caffeine content per serving is significantly higher, which can cause jitteriness or disrupted sleep
- Proper dilution lets the natural sweetness and smoothness of cold brew come through
- It gives you full control over strength, so you can match the cup exactly to your preference
👉 Dilution isn’t about making coffee weaker — it’s about unlocking the flavor that’s already there.
Best Ways to Dilute Cold Brew Coffee
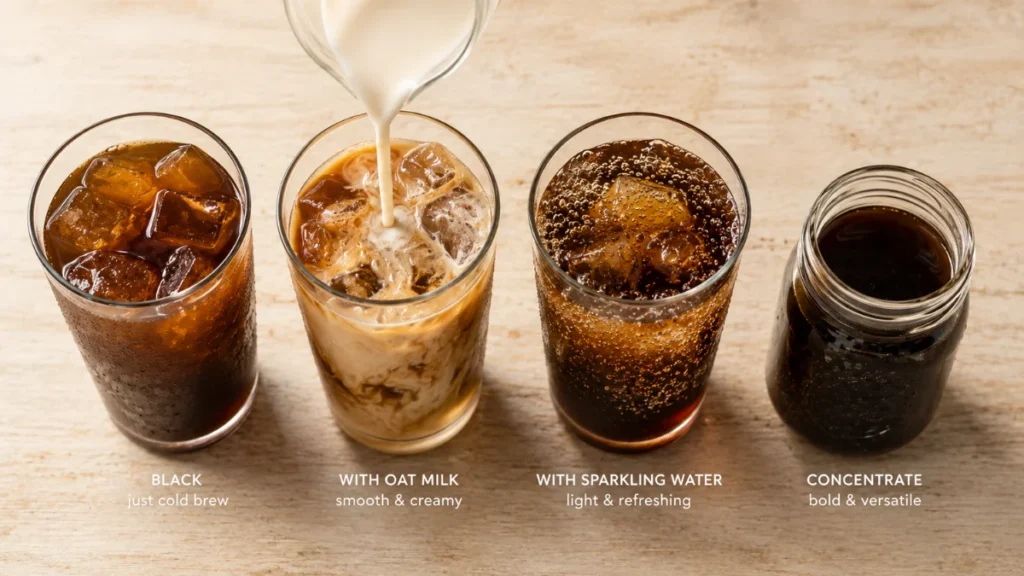
Each dilution method produces a noticeably different result. Here’s what to expect from each one.
1. Water — The Standard Method
Diluting with cold, filtered water is the most common approach and the cleanest way to experience the true flavor of your cold brew. It preserves the coffee’s character without adding any competing flavors.
- Use filtered or bottled still water for the cleanest result
- Start at 1:1 and adjust — go to 1:1.5 if it still feels too strong
- Room temperature water works, but cold water keeps the drink refreshing
For more details, read our Coffee Brewing Ratio Guide that breaks down everything you need to know about coffee-to- water ratios
👉 This is the best starting method if you’re trying a new cold brew for the first time.
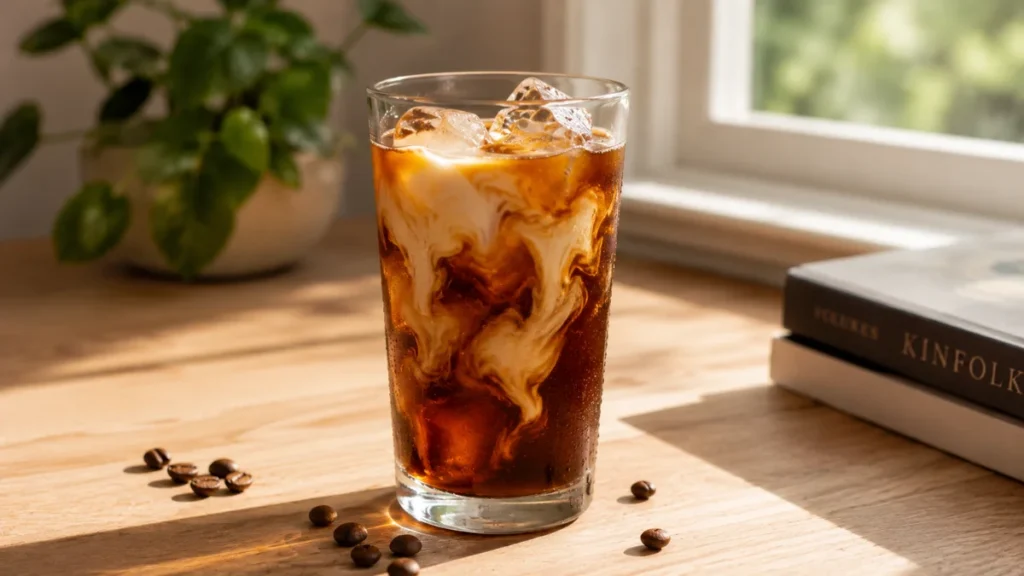
2. Milk or Cream — For a Richer Cup
Whole milk, oat milk, almond milk, or cream all work beautifully with cold brew. Milk softens the intensity of the concentrate, adds body, and naturally reduces any residual bitterness — making it ideal for dark roast cold brews that can taste a little sharp even after brewing.
- Whole milk: creamy and full-bodied
- Oat milk: slightly sweet, very smooth — pairs especially well with cold brew
- Almond milk: lighter texture, subtle nutty note
- Heavy cream: rich and indulgent — use sparingly as it dilutes less than milk
👉 Oat milk is currently the most popular cold brew pairing for good reason — the sweetness complements cold brew’s natural chocolate and caramel notes.
3. Ice — The Quickest Method
Simply pouring cold brew concentrate over a full glass of ice is a fast and effective dilution method. As the ice melts, it gradually dilutes the concentrate to a drinkable strength. The key is accounting for how much the ice will melt — start with a stronger ratio if you’re planning to drink slowly.
- Use large ice cubes — they melt more slowly and dilute more evenly
- Coffee ice cubes are an excellent option: freeze leftover cold brew in an ice tray to avoid watering down your drink at all
- For immediate drinking, use a 1:0.75 ratio so the ice melts balances it out

👉 Coffee ice cubes are a simple upgrade that takes 10 minutes of prep and completely solves the dilution-over-time problem.
4. Sparkling Water — For Cold Brew Tonic
Diluting cold brew with sparkling water creates a refreshing, effervescent drink that’s become popular in specialty coffee shops. The carbonation adds a brightness that complements cold brew’s smooth, mellow character — especially with lighter roasts.
- Use a 1:1 ratio to start
- Pour the cold brew first, then gently add sparkling water to preserve the carbonation
- Add a slice of citrus or a sprig of mint for a café-style finish
👉 Best with single-origin or lightly roasted cold brew where the origin flavors can shine through.
5. Water and Milk Combined
For a middle ground between clean and creamy, combining equal parts water and milk with your concentrate gives you a smooth, balanced drink without the full richness of an all-milk dilution. This is a good option for beginners still finding their preferred strength.
- Try: 1 part concentrate + 0.5 part water + 0.5 part milk
- Adjust the water-to-milk ratio until the texture suits you
Choosing Your Ratio by Use Case
The right dilution ratio depends not just on taste preference, but on how you’re serving the cold brew and what you’re adding to it.
| Situation | Suggested Ratio | Notes |
| Black, over ice | 1:0.75 | Account for ice melt |
| With milk, no ice | 1:1 | Milk adds body naturally |
| Iced latte with milk | 1:1 | Add ice after mixing |
| Sparkling cold brew tonic | 1:1 | Add sparkling water last |
| Cold brew cocktail mixer | 1:0.5 | Keep it bold to stand up to mixers |
| Sensitive to caffeine | 1:2 | Lower concentration per serving |
| First-time drinker | 1:1.5 | Start mild, adjust stronger |
How to Dilute Cold Brew — Step by Step
Follow this simple process for a consistently balanced cup every time.
- Measure your cold brew concentrate — use a jigger, measuring cup, or kitchen scale
- Choose your dilution liquid: water, milk, sparkling water, or a combination
- Start with a 1:1 ratio — equal parts concentrate and liquid
- Stir or gently swirl to combine
- Taste before adding ice or extras
- Adjust: add more liquid if too strong, or a splash more concentrate if too mild
- Add ice, milk foam, or toppings and serve
👉 Measuring by weight (grams) or volume (oz/ml) is more consistent than estimating by eye.
Common Mistakes When Diluting Cold Brew
| Mistake | What Happens | Fix |
| Not diluting at all | Overpoweringly strong, high caffeine | Always dilute concentrate before drinking |
| Over-diluting | Watery, flat, flavorless | Start at 1:1 and adjust slowly |
| Ignoring ice melt | Cup gets increasingly watered down | Use coffee ice cubes or a stronger starting ratio |
| Diluting too early | Shorter shelf life in the fridge | Store concentrate as-is; dilute per serving |
| Using hard tap water | Mineral taste dulls the flavor | Use filtered or bottled still water |
| Not stirring after mixing | Uneven flavor in the cup | Stir gently before tasting |
How Dilution Affects Taste and Caffeine
Dilution doesn’t just change strength — it shifts the entire flavor experience. Here’s what to expect at different ratios.
| Ratio | Flavor Profile | Caffeine Level | Best For |
| 1:0.5 | Intense, bold, almost syrupy | Very high | Coffee cocktails, espresso substitute |
| 1:1 | Smooth, balanced, satisfying | Moderate-high | Daily drinking, most palates |
| 1:1.5 | Light, gentle, easy-drinking | Moderate | Afternoons, caffeine-sensitive drinkers |
| 1:2 | Subtle, mild, very refreshing | Low-moderate | Hot weather, first-time cold brew drinkers |
👉 Cold brew naturally contains more caffeine than hot brew due to its higher coffee-to-water brewing ratio. Dilution is one of the most effective ways to manage your caffeine intake.
Storing Cold Brew Concentrate

One of the biggest advantages of cold brew is its long shelf life. Knowing how to store it correctly means you always have a ready supply to dilute on demand.
- Store undiluted concentrate in a sealed glass jar or airtight container in the refrigerator
- Properly stored, cold brew concentrate keeps for up to 2 weeks
- Once diluted, drink within 2–3 days — diluted cold brew degrades much faster
- Never store cold brew at room temperature for extended periods
- Use dark glass containers if possible — light exposure can affect flavor over time
👉 Always dilute per serving rather than the whole batch. This keeps your concentration fresh for much longer.
Frequently Asked Questions
Should I dilute cold brew with water or milk?
Both are excellent choices, and the right answer depends entirely on what you want from the cup. Water gives you the cleanest, truest expression of the cold brew’s flavor — ideal if you want to taste the coffee itself. Milk adds body and creaminess and naturally reduces residual bitterness, making it the better choice for bold or dark-roast cold brews. Many people combine both for a middle-ground result.
What is the best ratio for cold brew dilution?
The 1:1 ratio — one part concentrate to one part water or milk — is the universally recommended starting point. It produces a smooth, balanced cup that suits most palates. From there, adjust in small increments: add a little more liquid if it still feels too strong, or a splash more concentrate if you want more intensity. The ideal ratio is personal, and most people settle on a ratio between 1:0.75 and 1:1.5, depending on their taste preferences.
Can I drink cold brew without diluting it?
Technically, yes — but most people find undiluted cold brew concentrate uncomfortably intense. It’s significantly stronger than a regular cup of coffee, with a caffeine concentration that can cause jitteriness, particularly on an empty stomach. If you prefer a bolder drink, try a 1:0.5 ratio rather than skipping dilution entirely — it gives you the strength without the overwhelming intensity of pure concentrate.
Does dilution reduce the caffeine in cold brew?
Yes — dilution reduces the caffeine concentration per serving. The total caffeine in your concentrate doesn’t disappear, but it gets distributed across a larger volume of liquid, so each sip contains less. A 1:2 dilution will produce a noticeably lower-caffeine cup than a 1:0.5 dilution from the same concentrate. This makes dilution a practical tool for managing caffeine intake throughout the day.
What happens if I over-dilute cold brew?
Over-diluted cold brew tastes flat, thin, and watery — the body disappears, and the flavor becomes too subtle to be satisfying. If this happens, the simplest fix is to add a small amount of fresh concentrate to restore strength. Going forward, try reducing your dilution ratio by one step — from 1:2 down to 1:1.5, for example — and taste before adding more liquid.
How long does diluted cold brew last in the fridge?
Diluted cold brew should be consumed within 2 to 3 days when stored in a sealed container in the refrigerator. After that, the flavor degrades noticeably, and the drink loses its characteristic smoothness. Cold brew concentrate, stored undiluted, lasts up to two weeks. For this reason it’s always better to dilute per serving rather than preparing a large diluted batch in advance.
Conclusion
Diluting cold brew properly is less about following a strict formula and more about understanding your starting point and adjusting from there. Cold brew concentrate is a flexible, forgiving base — it works with water, milk, sparkling water, or ice, and responds well to small adjustments in either direction.
Start at a 1:1 ratio, taste critically, and move the ratio up or down in small steps until the cup suits you. Once you’ve found your preferred dilution, the process becomes second nature — and you’ll have a consistently great cold brew ready in seconds.
For guidance on brewing the concentrate itself, see our Cold Brew Coffee Guide. For tips on grind size and steeping, visit our Coffee Grind Size Chart.