Quick Answer Box
The most common pour over coffee mistakes are using the wrong grind size, skipping the bloom, pouring too fast, using water that’s too hot or too cold, and ignoring coffee-to-water ratios. Each one is easy to fix once you know what to look for — and most only require one small adjustment.
Introduction
Pour over coffee has a reputation for being fussy. The equipment list includes gooseneck kettles, scales, and timers. Online forums debate pour patterns with the seriousness of competitive sport.
The reality is more forgiving than the reputation suggests. Pour over is a simple method at heart — hot water through ground coffee. But a few common mistakes can throw off the result, turning what should be a bright, clean cup into something sour, bitter, or just flat.
This guide covers the mistakes most beginners make, explains why each one affects your brew, and gives you a straightforward fix for each one.
Mistake 1: Skipping the Bloom
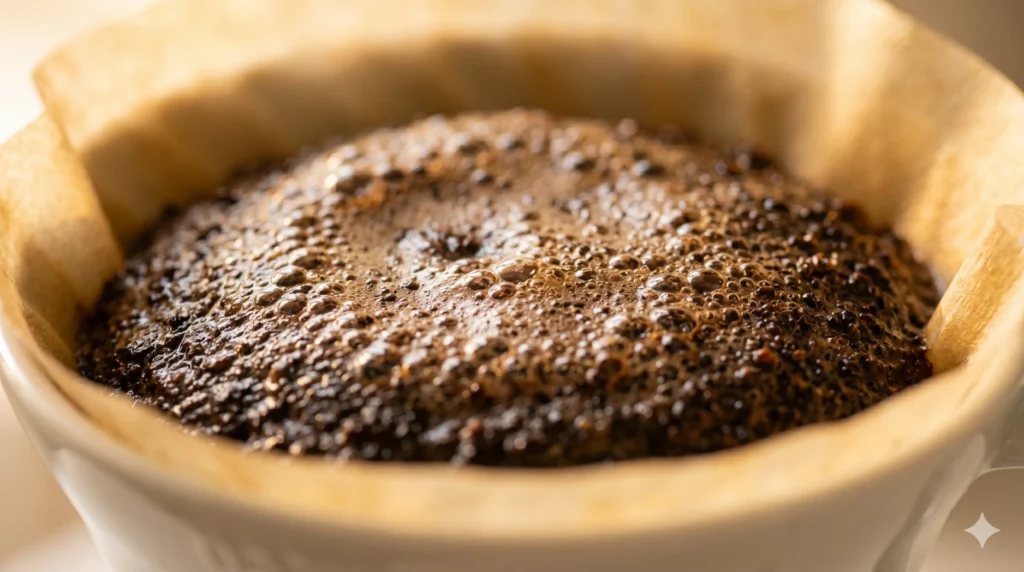
The bloom is the 30–45-second pre-infusion step at the start of a pour-over. You pour a small amount of hot water — roughly twice the weight of your coffee grounds — over the bed, let it saturate, and wait before continuing.
Fresh coffee releases carbon dioxide gas as it comes into contact with hot water. That CO2 creates a physical barrier between the water and the coffee. If you skip the bloom and pour straight through, water doesn’t make proper contact with all the grounds — and the result is uneven, under-extracted coffee with a noticeably sour or flat character.
A good bloom looks like the coffee bed swells and bubbles gently. The fresher the coffee, the more dramatic the bloom. If nothing happens when you add water, your coffee may be stale.
The fix: Always bloom. Add water equal to about twice the weight of your coffee (so for 20g of coffee, add 40g of water), start your timer, and wait 30–45 seconds before continuing. This step takes less than a minute and improves every pour over.
For a full explanation of why the bloom matters, see Coffee Bloom Explained later in this batch — and for the mechanics behind it, Coffee Extraction Explained goes deeper.
Mistake 2: Wrong Grind Size
Grind size is the most influential variable in pour-over brewing. Get it wrong and nothing else you adjust will fully rescue the cup.
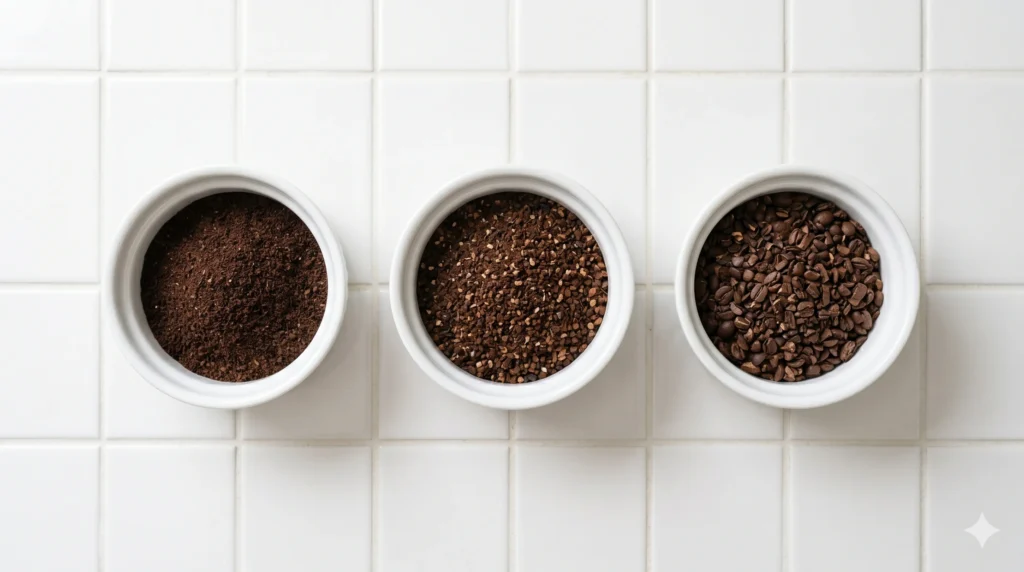
Pour over coffee needs a medium to medium-fine grind — roughly the texture of coarse sand, or slightly finer than table salt. A grind that’s too coarse lets water rush through too quickly, leaving you with under-extracted, sour coffee. A grind that’s too fine slows water dramatically, leading to over-extraction and bitterness — or a filter that clogs entirely.
The correct grind also depends on your dripper. A V60 with its fast-draining design needs a slightly finer grind. A Chemex, with thicker filters and slower drainage, works better with a slightly coarser grind.
The fix: If your brew tastes sour and finishes in under 2 minutes 30 seconds, grind finer. If it tastes bitter and drains slowly past 4 minutes, grind coarser. Use a burr grinder — blade grinders produce inconsistent particle sizes that cause simultaneous under- and over-extraction, and no amount of technique adjusts for that.
See the full Coffee Grind Size Chart to find the right starting point for your dripper.
Mistake 3: Using Water at the Wrong Temperature
Water temperature directly affects extraction speed and quality. Too hot, and you extract bitter compounds aggressively. Too cool, and you can’t dissolve the sweeter compounds that give pour over its characteristic brightness.
The ideal range for pour over is 195–205°F (90–96°C). Most people brew at the edges of this range or outside it entirely — either using water straight from a rolling boil (around 212°F / 100°C) or water that’s been sitting too long and has cooled too much.
For light roasts, aim for the higher end of the range, around 200–205°F (93–96°C). Light roasts are denser and need more heat to extract properly. For medium roasts, 195–200°F (90–93°C) works well.
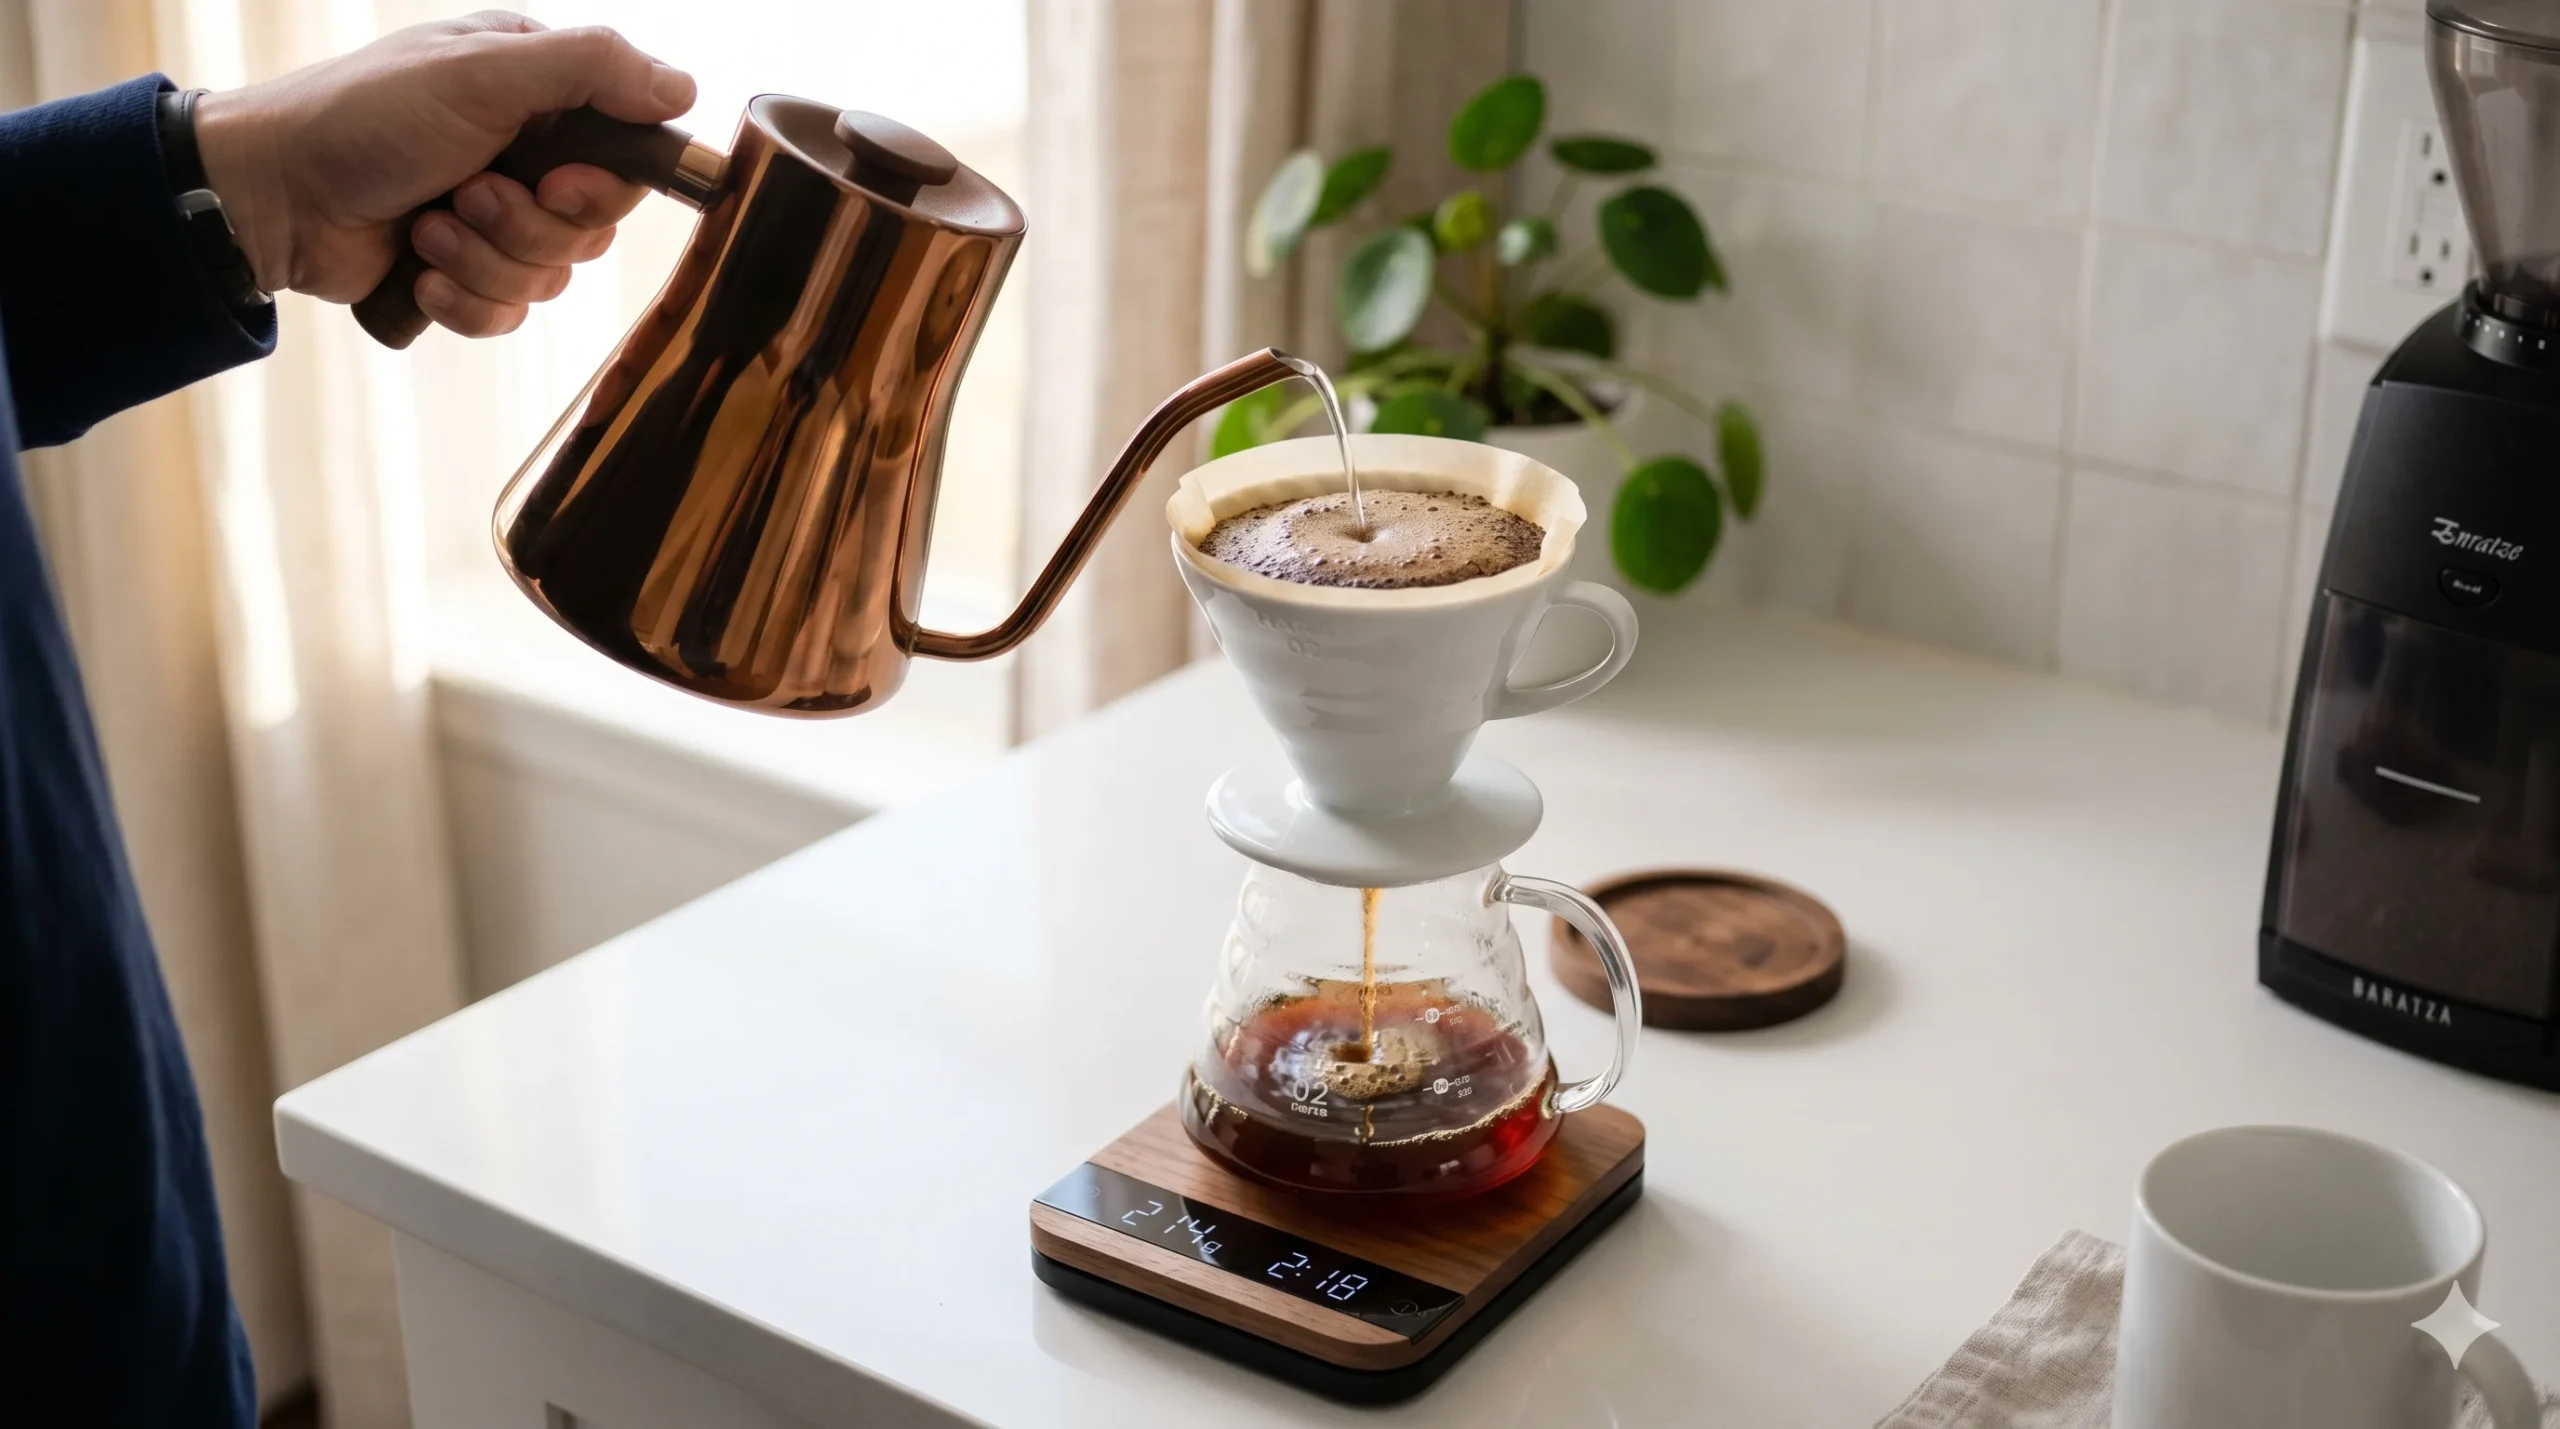
The fix: If you don’t have a temperature-controlled kettle, bring water to a full boil and let it sit off the heat for 30–45 seconds. That typically drops the temperature to around 200°F (93°C). A gooseneck kettle with a built-in thermometer makes it much easier to control the temperature consistently.
See Best Water Temperature for Pour Over Coffee for a full breakdown.
Mistake 4: Pouring Too Fast (or Too Slow)
How you pour water affects extraction as much as any other variable. Many beginners dump water in quickly and assume the filter handles the rest. It doesn’t.
Pouring too fast floods the coffee bed. Grounds don’t have time to saturate evenly, water channels through the path of least resistance, and extraction becomes uneven. The result is a flat, sour cup with a brew time that’s shorter than it should be.
Pouring too slowly is less common but creates the opposite problem — grounds sit in water too long, and the cup turns bitter.
The fix: Pour in slow, steady, circular motions, starting from the center and working outward. Keep the water level consistent above the coffee bed rather than letting it drain completely between pours.
A gooseneck kettle is designed specifically for this — its narrow spout gives you precise control over flow rate.
See How to Pour Water for Pour Over Coffee for a step-by-step technique guide, and How to Use a Gooseneck Kettle for Pour Over for additional technique guidance.
Mistake 5: Getting the Ratio Wrong
Ratio is one of the most overlooked variables in home brewing. Most people add a rough scoop of coffee and fill their dripper with water, which leads to wildly inconsistent cup-to-cup results.
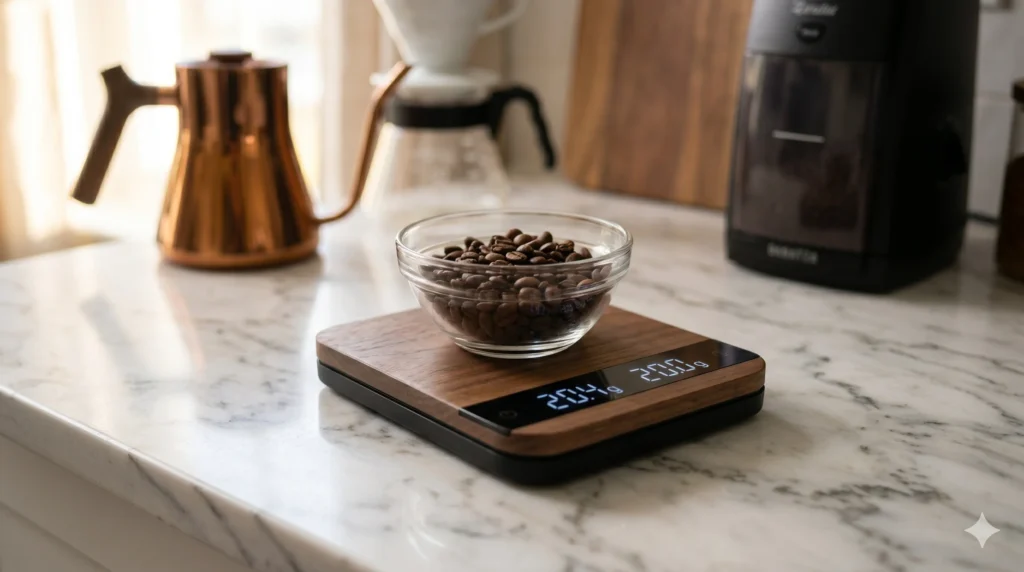
The standard starting ratio for pour over is 1:15 — 1 gram of coffee for every 15 grams of water. For a single serving using 20g of coffee, that’s 300g of water total.
Too much water relative to coffee produces a weak, diluted cup. Too little produces a brew that’s dense and overpowering.
The fix: Use a kitchen scale and weigh both your coffee and your water. You don’t need expensive equipment — a basic digital scale accurate to 1 gram is enough. Once you have a ratio that works, you can replicate it every time.
See Pour Over Coffee Ratio Explained for a full guide with serving size charts.
Mistake 6: Not Rinsing the Paper Filter
This is a small step that makes a noticeable difference. Paper filters carry a faint papery taste that transfers to your brew if you skip rinsing.
Place your filter in the dripper, pour hot water through it to rinse it thoroughly, then discard that water before adding your coffee. The rinse also preheats your dripper and server, which helps maintain brew temperature.
The fix: Rinse every time. It takes ten seconds and eliminates a flavor variable you don’t need. Use your brewing water to rinse — pour it straight through before you start.
Mistake 7: Using Stale Coffee
No technique fixes stale coffee. Even perfect grind size, temperature, and ratios can’t rescue beans that are past their best.
Fresh roasted coffee releases CO2 — that’s why the bloom works. As coffee ages, the CO2 dissipates. You’ll notice this when your bloom produces no bubbles at all. Along with the CO2, much of the aromatics that give coffee its brightness and complexity fade away.
Coffee is at its best within 2–4 weeks of roasting and within 2 weeks of grinding. Pre-ground coffee goes stale much faster than whole beans because grinding dramatically increases surface area exposed to air.
The fix: Buy whole bean coffee and grind just before brewing. Look for a roast date on the bag — not a “best by” date — and try to use beans within a month of that date. Store them in an airtight container away from light and heat, not in the freezer.
Mistake 8: Ignoring Total Brew Time
Total brew time is a useful diagnostic tool that most beginners overlook. For pour over, the target window is generally 2:30 to 3:30 minutes from the start of your bloom to the last drop draining through.
A brew that finishes in under 2 minutes is draining too fast — likely because the grind is too coarse. A brew that takes longer than 4 minutes is draining too slowly — the grind is too fine, or you’re pouring too slowly.
The fix: Start a timer when you begin your bloom. If you’re consistently outside the 2:30–3:30 window, adjust your grind before changing anything else. One notch coarser or finer on your grinder usually makes a measurable difference.
Mistake 9: Brewing for Two Without Adjusting Technique
Doubling your recipe doesn’t mean simply doubling everything and following the same steps. When brewing for two, the increased volume of water means longer drain times and a higher risk of uneven extraction if you’re not careful.
The fix: Scale your ratio, not your technique. Keep the same coffee-to-water ratio (1:15) but use a larger dripper designed for 2-cup output. Pour in more stages to keep the water level controlled, and expect total brew time to extend slightly.
See How to Brew Pour Over Coffee for Two for a full adjusted method.
Mistake 10: Using Tap Water Without Thinking About It
Water makes up more than 98% of your coffee. Using poor-quality tap water — heavily chlorinated, very soft, or very hard — directly affects both extraction and final flavor.
Chlorinated water can leave off-flavors. Very soft water (lacking minerals) under-extracts coffee even with perfect technique. Very hard water blocks extraction and leaves scale buildup on your equipment.
The fix: Filtered water is the simplest upgrade most home brewers can make. A basic pitcher filter removes chlorine and most off-flavors. You don’t need bottled water or specialized coffee water — just filtered tap water.
See Best Water for Coffee Brewing for the full breakdown.
Pour Over Troubleshooting Quick Reference
| Problem | Likely Mistake | Fix |
|---|---|---|
| Tastes sour | Grind too coarse / skipped bloom | Grind finer, bloom 30–45 sec |
| Tastes bitter | Grind too fine / water too hot | Grind coarser, lower temp |
| Tastes flat | Stale beans / wrong ratio | Fresh beans, check ratio |
| Drains too fast (<2:30) | Grind too coarse | Grind finer |
| Drains too slow (>4:00) | Grind too fine | Grind coarser |
| Papery aftertaste | Filter not rinsed | Rinse filter before brewing |
| Tastes watery | Too much water / weak ratio | Reduce water or add more coffee |
| Uneven extraction | Inconsistent grind or pour | Burr grinder + circular pour |
The Most Common Pour Over Coffe Mistakes: FAQs
How long should a pour over take from start to finish?
For a single-cup brew, the target window is 2 minutes 30 seconds to 3 minutes 30 seconds, measured from the start of your bloom. If it’s consistently outside that range, adjust grind size — coarser if it’s draining too slowly, finer if it’s draining too fast.
Do I really need a gooseneck kettle for pour over?
You don’t strictly need one, but it makes a real difference. A gooseneck kettle gives you precise control over flow rate and direction. A standard kettle with a wide spout makes it difficult to pour slowly and evenly, which affects extraction consistency. If you brew pour over regularly, a gooseneck kettle is the single most useful equipment upgrade.
Why does my pour over taste different every morning even when I do the same thing?
This usually comes down to grind consistency or water temperature. Blade grinders produce inconsistent results batch to batch. And if you’re estimating water temperature rather than measuring it, small variations compound over time. A burr grinder and a temperature-controlled kettle eliminate most of the day-to-day variation.
Is it worth using a scale for pour over?
Yes. A scale removes two variables — coffee dose and water volume — from every brew. Once those are locked in, you only need to think about grind size and technique. Scales accurate enough for pour over cost very little and last years.
Can I make pour over without a V60 or Chemex?
Yes. Any pour over dripper works on the same principle — hot water through coffee grounds over a filter. The differences between drippers (drain speed, filter thickness, cone vs flat bed) affect which grind size works best, but the fundamentals are identical.
Key Takeaways
- Bloom every time — 30–45 seconds with twice the coffee weight in water, before your main pour.
- Grind size is the first thing to adjust — sour means grind finer, bitter means grind coarser.
- Water temperature should be 195–205°F (90–96°C) — not straight from a rolling boil.
- Weigh your coffee and water — a 1:15 ratio is the reliable starting point.
- Fresh beans and a burr grinder resolve more problems than any other upgrade.